ByteDance Seed · Apparel field guide
Seedance 2.5 Apparel Video: From Product Link to a 10-Second Clip
A real Seedance 2 Mini apparel result, a model-aware workflow, and prompts you can adapt for Seedance 2.5.
Independent model guide · Updated September 20, 2026
Can a single product link become a directed apparel video task in about ten minutes of hands-on work? This page shows you a finished result first, then opens up how the task was prepared. Model queueing and rendering took additional time.
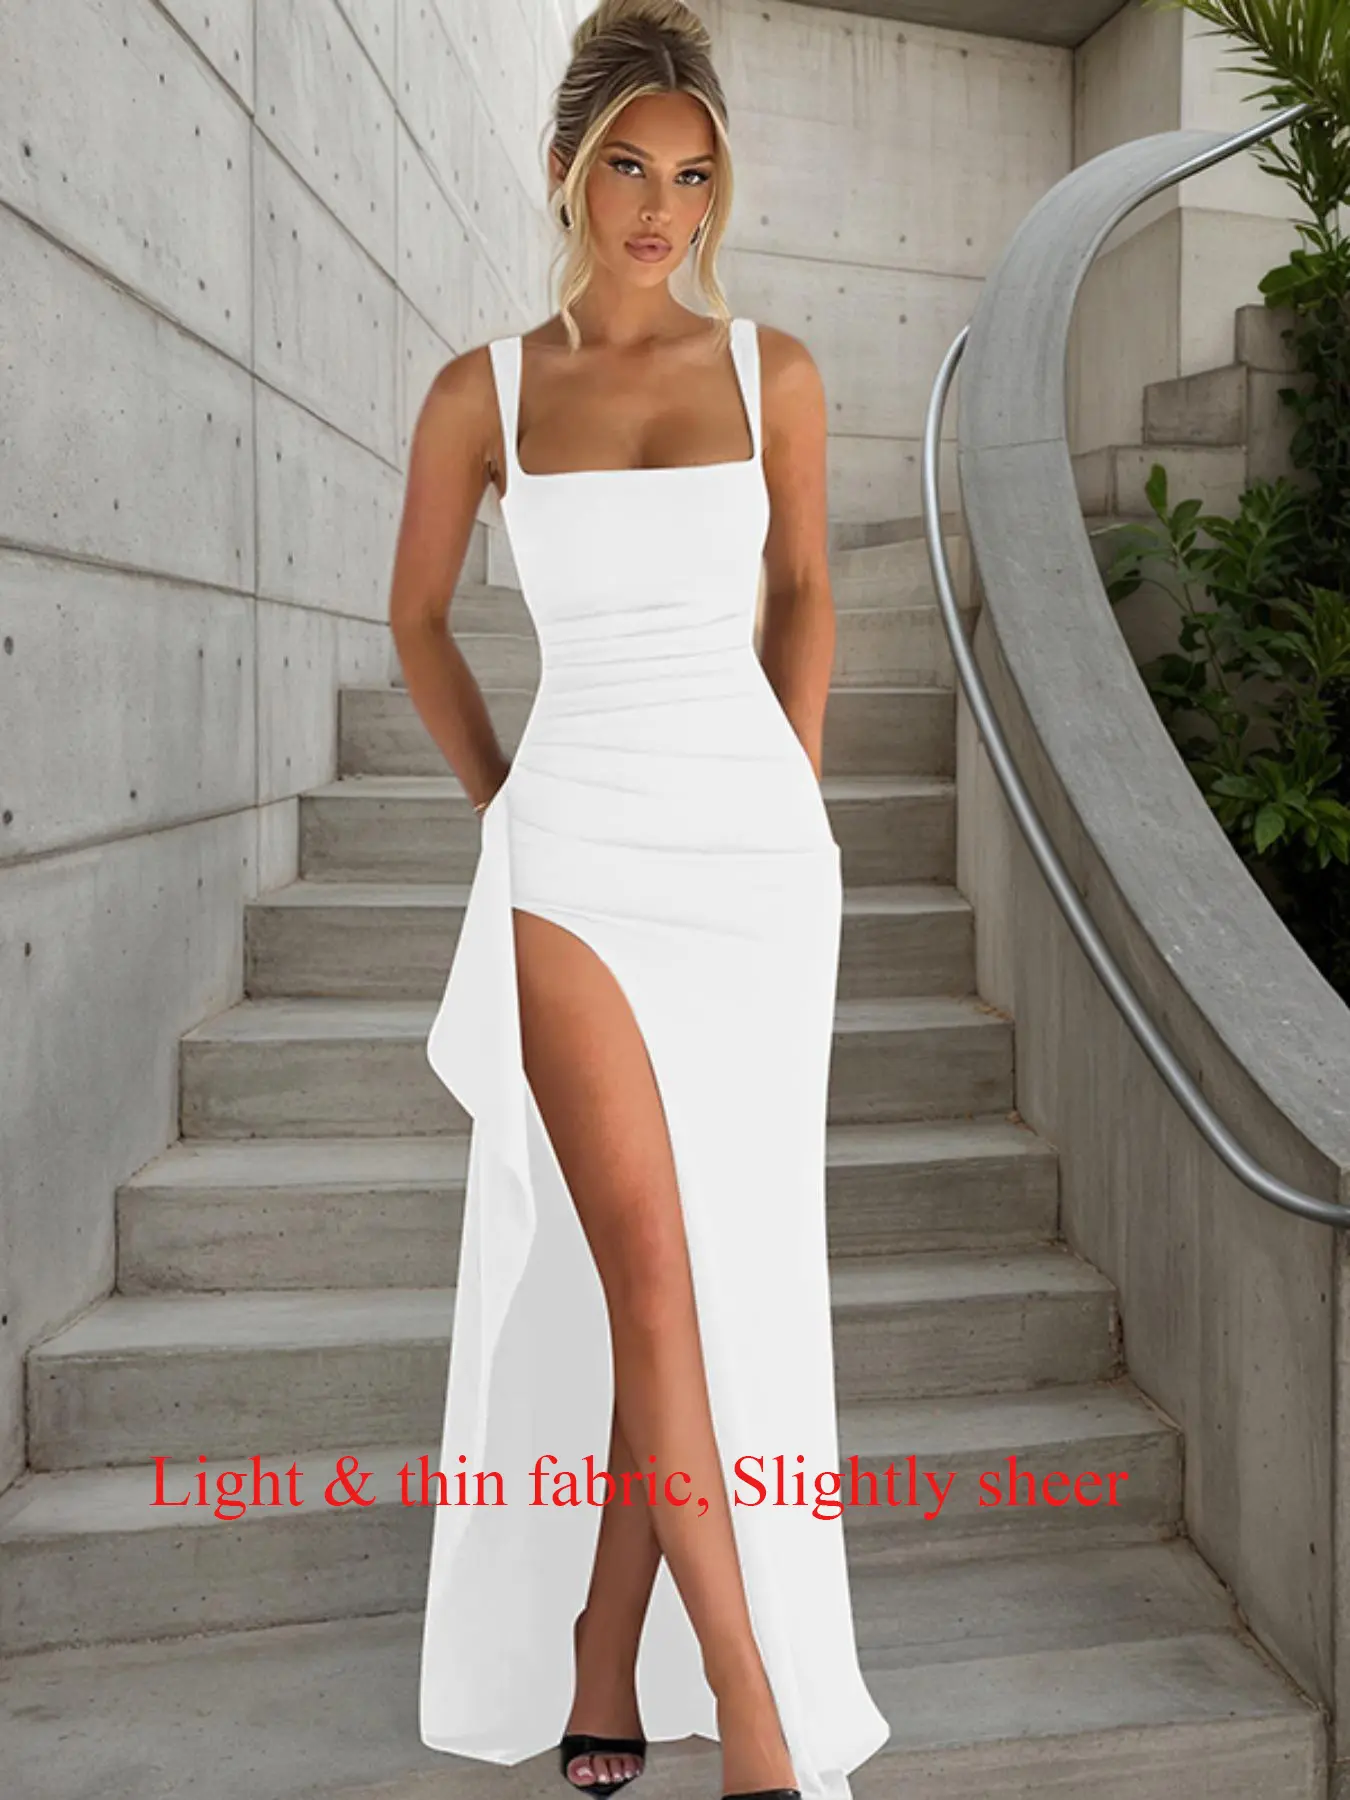
The product is a backless, high-slit, floor-length dress. The finished result is a 10-second vertical (9:16) clip built on four things: a city street setting, a couple-banter hook, a back-to-front garment reveal, and a closing call to action pointing to the bottom of the screen.
Who this is for: TikTok Shop sellers, apparel brands and creators turning product photos into short video. No prompt experience needed.
About the footage: the video below was produced on the Seedance 2 Mini pipeline that was available in the workspace at the time. The prompt structure and production workflow can be adapted for Seedance 2.5, subject to the settings available on your platform — but this is not a verified Seedance 2.5 output.
What Seedance 2.5 is good at
- Multimodal reference-led generation — you drive the output with reference images, not adjectives alone
- Up to 30 seconds, per the official launch
- Video editing and multi-round extension
Capability summary based on the provider’s published material. Limits and availability vary by model variant and access platform. Read the source ↗
Independent model guide. This page is a guide, not a generator, and listing a model here is not an integration announcement. Check the Zlink workspace for the models and settings actually available on your account.
Quick answer: 3 ways to reduce garment drift
- Start with clear product photos. Use one image for a simple shot; add another product angle when a key detail, such as this dress’s open back, needs to be shown.
- Describe the garment in structural language — verified cut, length, sleeves and visible fabric details — instead of relying on “same dress as the reference photo” alone.
- Keep camera movement restrained. Inspect prints, seams and logos frame by frame, especially during turns and close-ups.
The result
Product link
Open the TikTok Shop product page ↗
Video
Here is the finished 10-second result from this remake run:
Reminder from above: this result came off the Seedance 2 Mini pipeline. The prompt and workflow below can be adapted to Seedance 2.5 where its available settings allow; the clip itself is not a Seedance 2.5 benchmark.
The final cut keeps four beats:
- Back view opening shot, so the audience sees the dress construction first.
- Turn to camera, moving from back detail to front detail in one move.
- Walk in, half turn, lift the hem, putting the fabric and the slit in motion.
- Lean toward the lens and point down, closing with an explicit TikTok Shop CTA.
This is not a product photo that happens to move. What makes it useful is that product facts, an adapted engagement structure, shot rhythm, voiceover and the purchase action all land inside the same 10 seconds.
How it was made: a 10-minute timeline
The timeline below counts page actions and content decisions. It deliberately excludes model queueing and render waits, which vary with network, cache and model load.
| Time | What I did | Output |
|---|---|---|
| 0–1 min | Paste the product link, read title, hero image and garment structure | Confirmed the product facts: floor length, open back, cinched waist, high slit |
| 1–3 min | Review the creative brief and similar seller videos | Chose a structure: couple banter + street-style reveal + CTA |
| 3–5 min | Enter trend replication with the product image and reference video | Got character relationships, shot order, voiceover and negative constraints |
| 5–7 min | Check front/back references, product details, and the 10-second compression | Specified the back detail, slit and hem length to inspect in the result |
| 7–10 min | Set 9:16, 10 seconds, 1080p, submit | Closed the loop from product link to video task; final result arrives after rendering |
The core of this process is not “let AI invent a video.” It is turning a product link into a brief you can actually execute, then compressing that brief into shots and prompts a model can run.
Inside the remake
You saw the result. Now the process: the target product is that backless, high-slit, floor-length dress, and the reference was a street-shot video built around couple interaction.
The planning artifacts in this section are a brief and remake plan. The video above is an actual Seedance 2 Mini result. You can adapt the plan for Seedance 2.5, adjusting duration, references and resolution to the version and platform you use; this article does not show a Seedance 2.5 render.
The reference offers more than “a model walking in clothes.” It combines three elements:
- A couple’s opening line gives the scene an immediate human interaction.
- The dialogue naturally carries the back reveal, the front reveal and the fabric movement.
- The ending points to the product link as a possible next action.
The original reference runs about 15 seconds. We compressed it to 10 — keeping the content skeleton rather than copying its people and locations frame by frame.
What the briefing stage solves
The brief starts by extracting reusable engagement mechanics from similar product videos. What this case matched was a structure — city street + garment display + couple banter hook — not a specific model, street or line of dialogue.
So we kept:
- Couple interaction — an off-screen male voice teases; she answers and shows the product.
- Reveal order — open on her back, turn to the front, walk toward camera, close by pointing down.
- Atmosphere — warm daylight, cobblestone street, red-brick buildings, outdoor café seating.
- Product priorities — open back, cinched waist silhouette, high slit, movement in a light fabric.
And we replaced:
- The original models and the original garment.
- Brand identifiers and the original music.
- Any action, color or detail that does not suit the new product.
The 10-second shot plan
| Time | Shot | Job |
|---|---|---|
| 0–2s | She walks away from camera in the white floor-length backless dress, dappled sunlight on a cobblestone street. The off-screen male voice speaks first. | Hook with couple banter while showing the back and the overall silhouette |
| 2–4s | She turns to camera in slim gold sunglasses, iced matcha in hand, playfully confused. | Move from back to front; reveal the neckline, cinched waist and slit |
| 4–7s | She steps closer and turns gently, letting the light fabric move, lifting the hem slightly. | Show how it wears and how light the fabric is |
| 7–10s | She leans into camera, smiles, and points down toward the lower part of the screen. | Deliver an explicit purchase CTA |
The advantage of this structure is that each shot carries exactly one job. Complex motion can make product details harder to preserve. Separating the garment reveal and the interaction into short beats makes changes easier to spot and revise.
A prompt you can run
Vertical 9:16, cinematic 10-second TikTok video. Warm golden daylight on a
city cobblestone street with red-brick brownstone buildings, outdoor cafe
seating, and dappled tree shadows.

Shot 1, 0-2 seconds: close back shot of a young blonde woman walking away
from the camera in the same white floor-length backless dress from the
reference image. Preserve the fitted silhouette and show the back design.
An off-screen male partner starts speaking.

Shot 2, 2-4 seconds: she turns to face the camera, wearing slim gold
sunglasses and holding an iced green matcha drink. She looks playfully
confused and shows the dress neckline, ruched waist, and high slit.

Shot 3, 4-7 seconds: she takes small steps toward the camera and makes a
gentle turn to show the light, flowy fabric moving naturally. She lifts the
hem slightly to reveal the slit. A man's hand briefly enters from the edge
of the frame in a playful gesture.

Shot 4, 7-10 seconds: she leans toward the camera, smiles with visible teeth,
and points directly down toward the lower part of the screen for the CTA.

Keep the same dress design, length, back opening, neckline, ruched waist,
slit placement, and true-to-reference color throughout the video. Natural
couple conversation, casual playful body language, realistic fabric movement,
photorealistic details. Use a royalty-free upbeat pop track with warm acoustic
guitar and light percussion. Do not copy the original video's music.
Voiceover that does not steal the product moment
This short sample dialogue points to visible garment details and leaves factual specifications and offers to the product listing:
A: That back detail!
B: Wait until you see the front.
A: Okay, show me.
B: The product link is right below.
The opening line calls attention to the back design, and the next line creates a reason to see the front. The CTA points to the listing without inventing a discount or an unverified fabric claim.
Negative prompt
stiff robotic poses, unnatural fabric sheen, distorted dress proportions,
overexposed bright lighting, blurry details, visible watermarks, extra limbs,
mismatched dress design, overly made-up fake appearance, crowded messy
background, copyrighted music, dress changing shape, hem length changing,
back opening disappearing, slit placement changing, color shift
The point is not to pile up “do nots.” It is to lock down the fields most at risk for this garment: hem length, open back, slit placement, color, fabric feel. Those are worth far more than a generic “keep the outfit consistent.”
Settings and real limits
- Aspect ratio: 9:16, built for the TikTok feed.
- Duration: 10 seconds for this Seedance 2 Mini run. We shortened the roughly 15-second reference structure and reallocated the shots; check the duration supported by your chosen model.
- Resolution: 1080p.
- Reference images: prefer both front and back candidates from the product gallery, and confirm the role of each image before generating — otherwise the model may read the back shot as the front construction.
- Music: a royalty-free upbeat track, not the reference video’s original song.
This run also reused cached TikTok assets, extracted the reference voiceover and checked a product image snapshot. Those were parts of this particular workspace run; the prompt alone does not reproduce them.
What is actually worth copying
It is not the surface combination of “white dress + café street.” It is this production logic:
Extract the engagement mechanic and reveal rhythm from a reference video, then re-bind product facts, shot actions, voiceover and CTA to your own product.
For apparel, a practical planning order is:
- Lock the garment structure first — length, neckline, sleeve, back, slit, color.
- Then choose the mechanic — couple dialogue, contrast opening, everyday movement, or detail macro.
- Split it into 3–4 short shots, each carrying one display job.
- Add setting, music and CTA last, so atmosphere words never overwrite product facts.
That gives you more to evaluate than a literal translation of a reference video into a prompt: the product, motion, dialogue and CTA each have a defined role.
Prompt templates you can copy
Template 1 — On-body movement (turn / walk / drape)
The TikTok Shop workhorse: get the garment moving the way it does in a real fitting-room video.
A young woman wearing [GARMENT: e.g. a rust-orange ribbed knit midi dress],
standing in a bright studio with a seamless light-grey backdrop.
She slowly turns from facing the camera to a three-quarter view, then
returns. The fabric moves naturally with her turn — [FABRIC BEHAVIOR:
e.g. the skirt sways gently and settles]. Soft diffused daylight from
the left. Medium shot, eye level, locked-off camera. Photorealistic,
sharp focus on the garment, true-to-photo colors.
Negative prompt:
garment changing shape, dress length changing, extra sleeves, morphing
pattern, warped hands, extra fingers, logo distortion, face close-up,
camera movement, zoom, background objects
Suggested settings: start with one product photo for this simple shot. Try five seconds and a locked-off camera; compare the result before adding more references or movement.
Why try it: one continuous turn is easier to review than several actions. Structured vocabulary (“ribbed knit midi”) names details to check; a negative prompt may help if your platform supports one.
Template 2 — Flat lay / detail macro (stitching, fabric texture)
The “proof of quality” shot — seams, texture, hardware.
Slow overhead shot of [GARMENT] laid flat on a warm white linen surface.
The camera holds on the full garment for a moment, then a slow, subtle
push-in toward [DETAIL ZONE: e.g. the collar and top button area].
Visible fabric texture: [MATERIAL: e.g. heavy 350gsm fleece with a soft
nap]. Natural window light from the top-left, gentle shadow. No hands,
no props, no movement in the garment itself. Photorealistic, macro-level
detail on stitching.
Negative prompt:
hands in frame, fabric moving by itself, pattern morphing, seams changing,
color shift, text artifacts, watermark
Suggested settings: start with a product image matching the described angle and a four to five second shot. Keep the push-in subtle and check the resulting texture against the source photo.
Why it works: with no body to drift, the risk shifts to invented texture. Focusing on one local area (collar, buttons) makes invented details easier to detect during the push-in.
Template 3 — Lifestyle scene (street / everyday)
The shot that stops the scroll: your garment in a real environment, actually being worn.
A woman in her mid-20s wearing [GARMENT] walks toward the camera along
a [SCENE: e.g. quiet city sidewalk in the morning, café terraces on the
left]. Natural walking pace, relaxed posture, occasional glance at
shopfronts. The garment fits as in the reference photo — same length,
same fit, sleeves as shown. Golden hour light, soft contrast. Tracking
shot from a phone-camera distance, slight natural shake, 4K look.
Negative prompt:
outfit changing between frames, garment color shift, different shoes,
crowd, text, logos on background, dramatic camera movement, face
distortion
Suggested settings: start from the same verified product photos for each shot and compare continuity before editing them together. Try five to six seconds per shot; three shots can make a 15–18 second cut.
Why try it: walking adds motion to inspect, so the prompt restates the garment details (“same length, same fit, sleeves as shown”) rather than assuming the reference image will preserve them.
Settings cheat sheet
| Setting | Recommended | Why |
|---|---|---|
| Reference images | Start with 1 product photo; add a verified second angle when needed | Compare garment details across outputs |
| Duration | Try 4–6s per shot | Easier to review individual actions; check platform limits |
| Camera | Minimal / locked off to start | Inspect patterns during camera movement |
| Resolution | Highest available | You can downscale later; upscaling magnifies fabric flaws |
| Seed | Reuse if your platform exposes it | Compare variations from the same starting settings |
| Negative prompt | Use if your platform supports it | State specific details to inspect after generation |
Troubleshooting: the 4 failures you’ll hit first
1. The garment morphs into a different silhouette mid-shot. Possible cause: clothing described too loosely (“a stylish dress”). Fix: name the structure — cut, length, sleeve, fabric weight — and repeat “same fit as reference photo”.
2. Prints and logos warp. Possible cause: small high-contrast graphics are difficult to preserve across moving frames. Fix: shoot heavily printed pieces with template 2 (flat lay) where nothing moves, or reduce visible logo area through styling — tuck, layer, knot.
3. Hands and cuffs break. Possible cause: hand interactions add detail that is difficult to preserve across frames. Fix: remove hand interaction from the prompt and take the motion from walking and turning instead.
4. Color does not match the product photo. Possible cause: scene lighting words (“golden hour”) can affect the apparent garment color. Fix: for color-sensitive items, use template 1 with “true-to-photo colors” and neutral daylight; save atmospheric shots for items tolerant of color shift.
QUESTIONS
Seedance 2.5 apparel FAQ
How many reference images should I use for a Seedance 2.5 apparel video?
Start with one clear product image for a simple shot. Add a verified second angle when a detail such as an open back is otherwise missing, then compare the outputs. The model's supported reference count can be higher; one image is a workflow suggestion, not a model limit.
Why does my dress change length in the video?
One possible cause is that the prompt does not name the garment length. Describe the verified hem length, then compare generated frames with the product photo. If your platform supports a negative prompt, you can add 'dress length changing'.
Can Seedance 2.5 keep a logo accurate?
Small text and logos can change between frames. Inspect them against the source, avoid a sweeping close-up if they are important, and correct the result in editing rather than treating a generated logo as verified product detail.
What clip length works best for TikTok Shop apparel videos?
As a starting template, try three 4–6 second shots: on-body movement, detail, and lifestyle. Edit to the length your audience and platform need; this article does not claim a measured conversion benefit for that pacing.
What is Seedance 2.5, and how is it different from Seedance 2?
Seedance 2.5 extends the family toward longer audiovisual storytelling, reference-led generation, and video editing with multi-round extension. The official launch describes up to 30 seconds, but real limits vary by variant and platform.
Can I generate video directly on this page?
No. This is a model guide, not a generator. Open the Zlink workspace to see the models and settings actually available to your account — inclusion in this library is not an integration announcement.
Is the example prompt a tested model output?
No. It is an original Zlink creative brief for you to adapt, not a benchmark or a generated sample. Confirm your selected model supports the inputs requested, then inspect the result against your real product.
How should I compare models for an apparel campaign?
Run the same source assets through each model and check seams, fastenings and color across scene changes; drop any scene that changes the product. Then score on product fidelity, motion, editing effort, and the total cost of usable results.
Give your next product brief to Zlink.
Bring a product link to the workspace and review the creative plan, shots, and prompts available to your account.
Open Zlink workspace →